目前发布博客内容采用直接将本地仓库中的 source 推送进远程 Github 仓库,之后交由 Netlify 持续集成自动发布即可。
为了实现多端编辑、更新,手机端可以使用 Working Copy,电脑端使用 git 或者网页上在 Github 中直接操作也很方便。在此之外还可以借助 netlify 完成一个网页端编辑发布博客内容的 CMS 系统,今天在这里做一次实现记录。
使用 netlify、hexo、github。
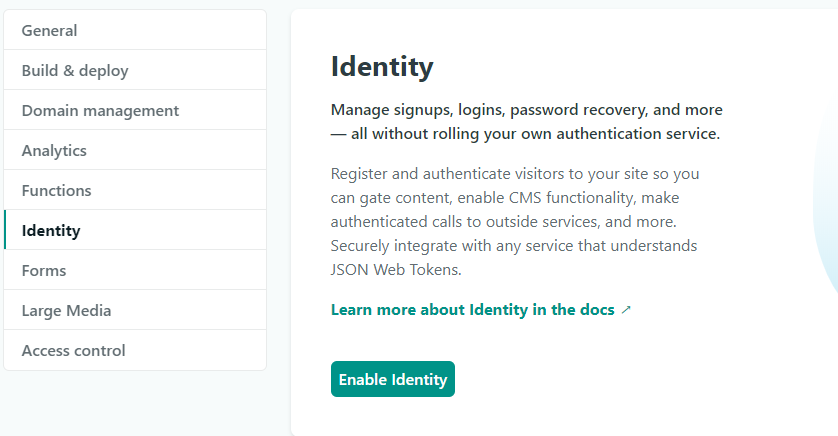
首先在 netlify setting 中启用 Identity,如图:

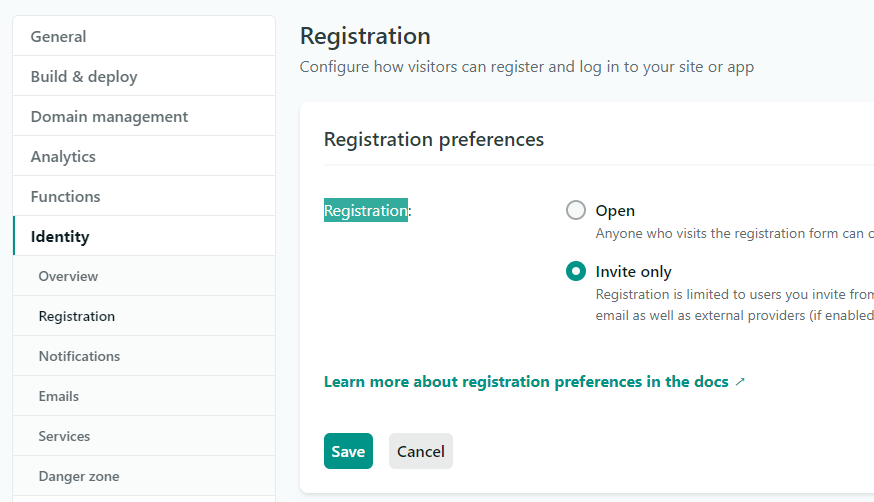
出于安全性考虑,将 Registration 设置为仅邀请,此部分将在启用 identity 之后出现。

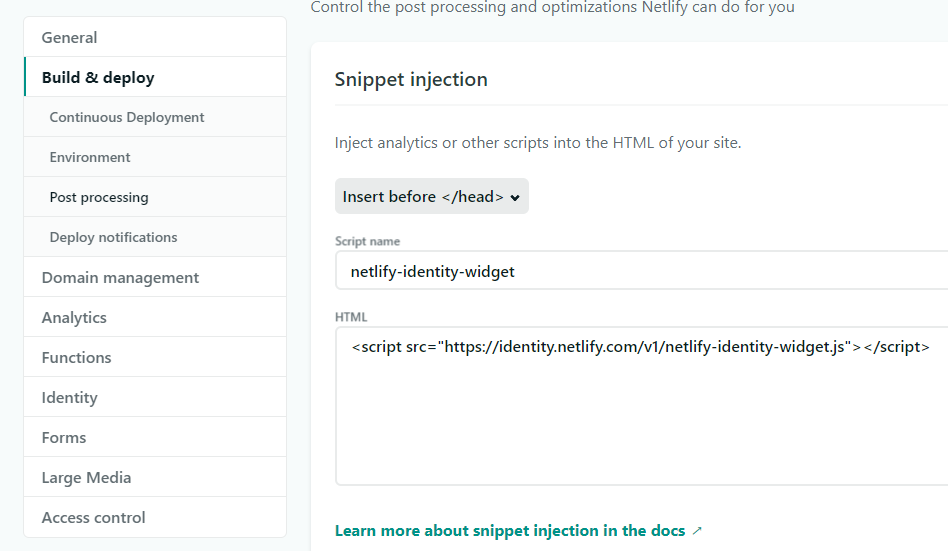
在 setting > Build&deploy > Post processing > Snippet injection 引入所要用到的脚本文件。
<script src="https://identity.netlify.com/v1/netlify-identity-widget.js"></script>

之后在博客 source 文件夹下创建 admin 文件夹,其中创建 config.yml,index.html 文件。
index.html 文件内容如下:
<!doctype html>
<html>
  <head>
    <meta charset="utf-8" />
    <meta
      name="viewport"
      content="width=device-width, initial-scale=1, minimum-scale=1, maximum-scale=1, user-scalable=no"
    />
    <meta http-equiv="X-UA-Compatible" content="IE=edge,chrome=1" />
    <meta name="apple-mobile-web-app-status-bar-style" content="white" />
    <title>CMS</title>
    <link rel="stylesheet" href="https://cdn.jsdelivr.net/npm/netlify-cms@^2.0.0/dist/cms.css" />
    <script src="https://identity.netlify.com/v1/netlify-identity-widget.js"></script>
  </head>
  <body>
    <script src="https://cdn.jsdelivr.net/npm/netlify-cms@^2.0.0/dist/netlify-cms.js"></script>
  </body>
</html>
config.yml 文件中内容每人并不相同,我的设置如下,各自按需修改分支、目录等内容即可。
backend:
  name: git-gateway
  branch: master # Branch to update (optional; defaults to master)

# This line should *not* be indented
publish_mode: editorial_workflow

# This line should *not* be indented
media_folder: “source/images/uploads” # Media files will be stored in the repo under images/uploads
public_folder: “/images/uploads” # The src attribute for uploaded media will begin with /images/uploads

collections:
  - name: “posts” # Used in routes, e.g., /admin/collections/blog
    label: “Post” # Used in the UI
    folder: “source/_posts” # The path to the folder where the documents are stored
    create: true # Allow users to create new documents in this collection
    slug: “{{slug}}” # Filename template, e.g., YYYY-MM-DD-title.md
    fields: # The fields for each document, usually in front matter
      - { label: “Layout”, name: “layout”, widget: “hidden”, default: “blog” }
      - { label: “Title”, name: “title”, widget: “string” }
      - { label: “Author”, name: “author”, widget: “string” }
      - { label: “Publish Date”, name: “date”, widget: “datetime” }
      - { label: “Updated Date”, name: “updated”, widget: “datetime” }
      - { label: “Featured Image”, name: “thumbnail”, widget: “string” }
      - { label: “urlname”, name: “urlname”, widget: “string” }
      - { label: “Tags”, name: “tags”, widget: “list” }
      - { label: “Categories”, name: “categories”, widget: “list” }
      - { label: “TOC”, name: “toc”, widget: “boolean”, default: true }
      - { label: “Body”, name: “body”, widget: “markdown” }
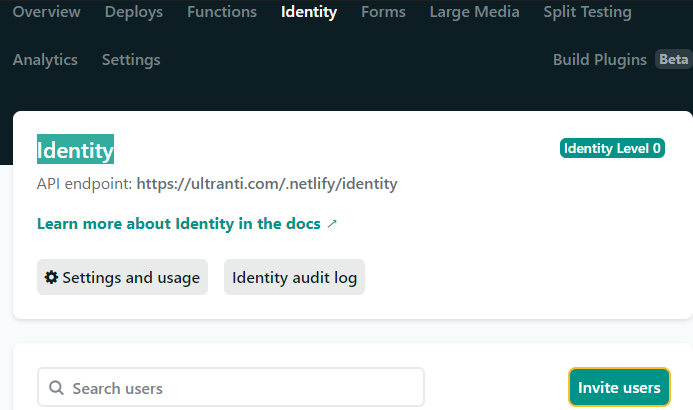
完成全部操作之后,就推送进入 GitHub 远程仓,等待 netlify 发布完成。之后回到 netlify 在 Identity 中填写邮箱邀请,之后邮箱会收到一份 netlify 发送的邮件,按提示点击进入博客主页会弹出设置密码页面,完成后即可登陆 CMS 编辑博客内容。

以后访问 yoursite.com\admin 即可登陆CMS 编辑博客内容。

